Multi Sub Object Modeling: EDIT POLY
3 posters
Page 1 of 1
 Multi Sub Object Modeling: EDIT POLY
... hello...
... this is a crash intro to Multi Sub Object Modeling via EDIT POLY...
... "Spare" muna natin ang details for Later...
... what is important is...
... magkaroon kayo ng "Workable Familiarization" sa EDIT POLY Modifier and its ROLLOUTS & R. CLICKS options...
... ok... Gambaru!!! Hajime!!!
(i included steps to use units para dun sa mga sanay sa units... pero di ako mag bibigay ng specific measurements
or values...remember... spare the details...)
1. Go to CUSTOMIZE, UNITS SET UP
(pumili ng units na kabisado mo...)
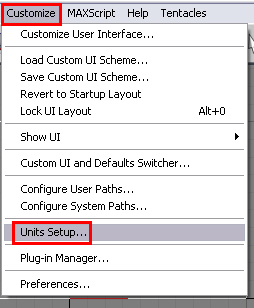
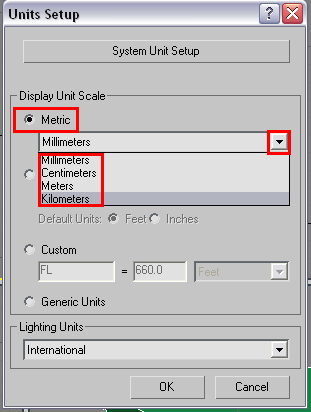
2. Go to CREATE, GEOMETRY, BOX
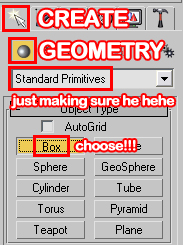
3. Click and drag to create
4. Go to the MODIFY panel, and adjust the MEASUREMENTS
(keep the segments to 1)
... be sensitive on the use of VIEW PORTS
(as you can see.. I shifted the view without mentioning it...)
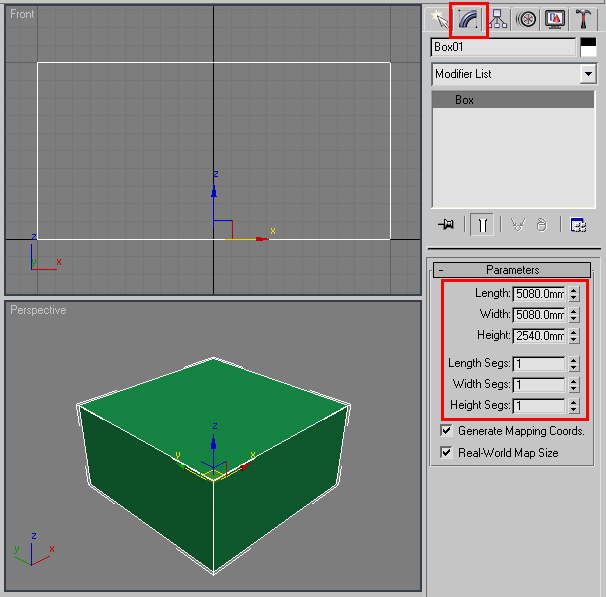
5. Center the BOX via RIGHT CLICKING at the UCS SPINNERS

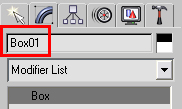
6. Change the BOX name to HOUSE
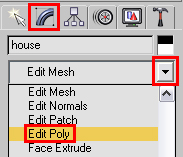
7. Go to the MODIFIERS List, choose EDIT POLY
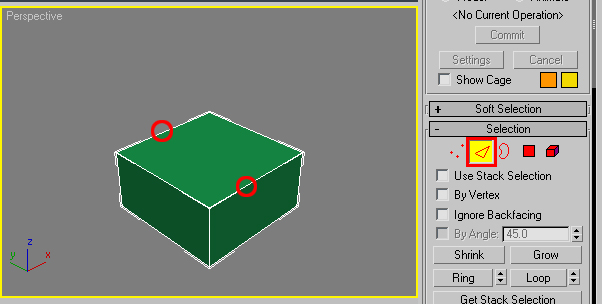
8. Go to the SELECTION rollout, click EDGE selection
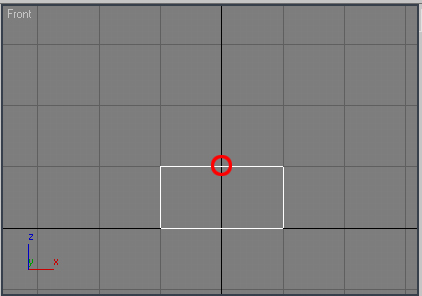
("CTRL CLICK" para ma- "MULTIPLE SELECT" yung 2 top edges at the front...)
(pwede mo din gain to sa front viewport... via click and drag)
9. RIGHT CLICK and choose CONNECT SETTINGS
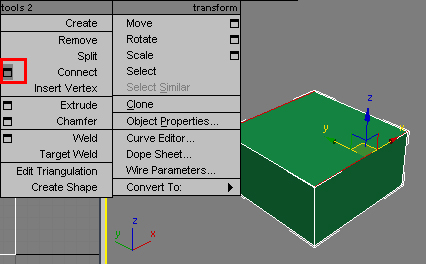
10. Set the VALUE to 1 and press OK
(sa ngayon... 1 lang muna, later, pwede mong laruin ang mga values)
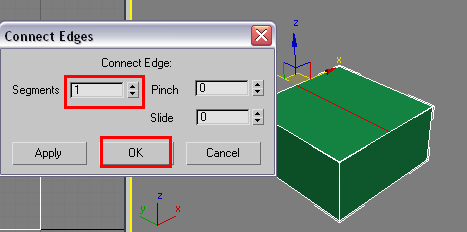
11. CTRL click on the VERTEX selection
(para slected pa din yung mga bagong vertex na created from the edge connection)

12. Drag up the selected vertices
(from here you can see, via PUSH or PULL of vertices, you can reshape the POLYGON...)
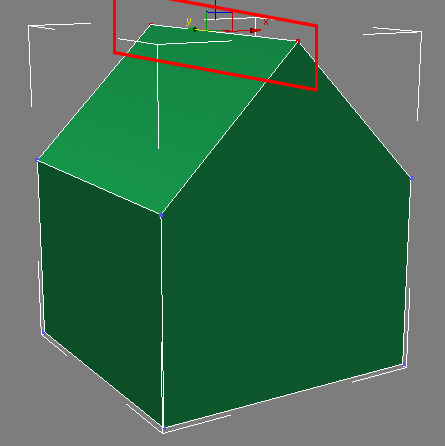
13. Select the 4 top corner vertices
14. RIGHT CLICK and choose CONNECT SETTINGS
(as you can see, pwede kang mag add ng detail via CONNECT commands)
(CONNECT command is only allowed to EDGES and VERTICES)
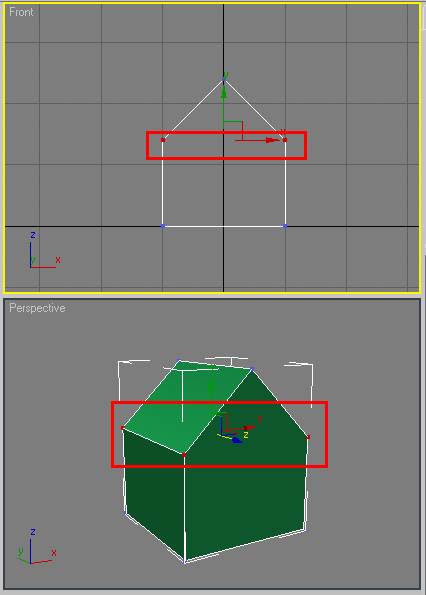
15. Click POLYGON selection
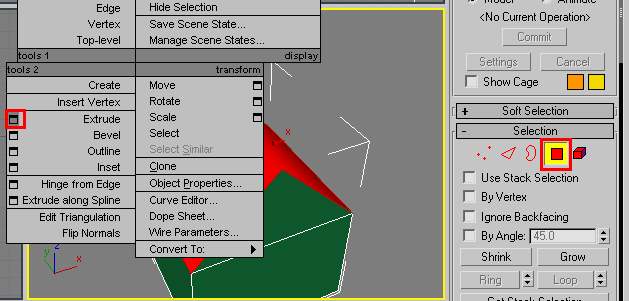
16. Select the ROOF polygon, RIGHT click, and choose EXTRUDE settings
(self discovery part na yung GROUP, LOCAL NORMAL, and BY POLYGON)

17. You can select NEWLY CREATED polygons and also apply EXTRUSION

18. You can also use other EDIT POLY settings like BEVEL, OUTLINE, INSET etc.
(again...self discovery part na tong mga to...)
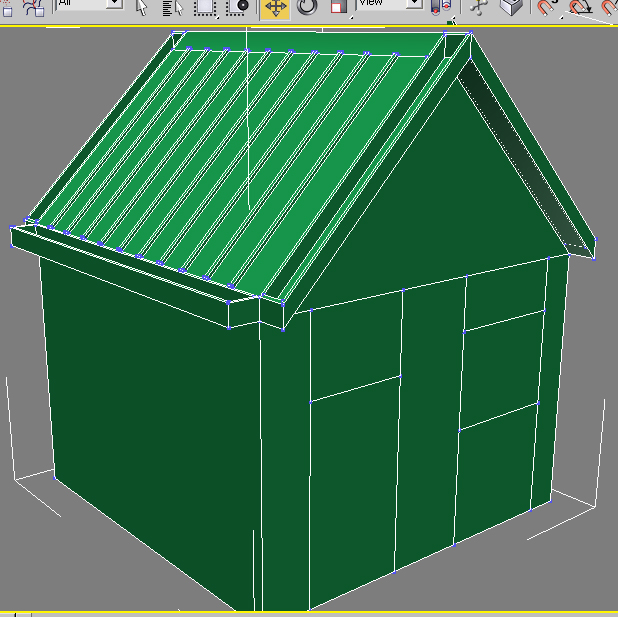
19. You can further add POLYGONS via EDGE CONNECTIONS
and further add detail with other edit polygon settings
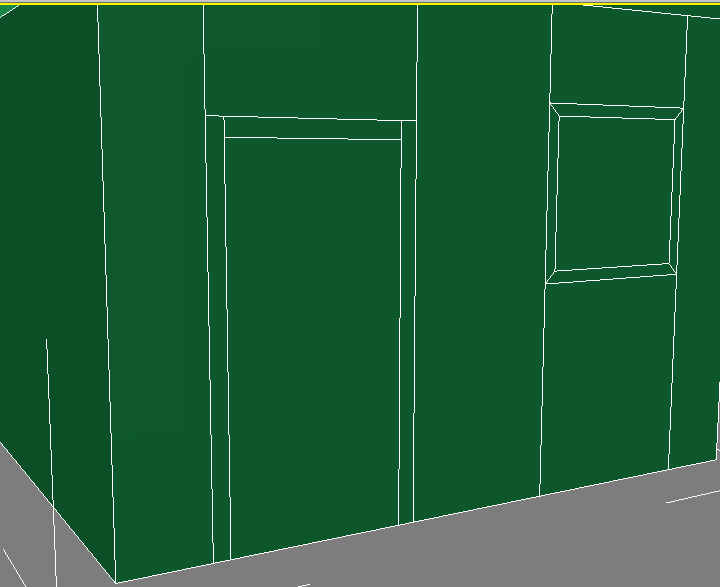
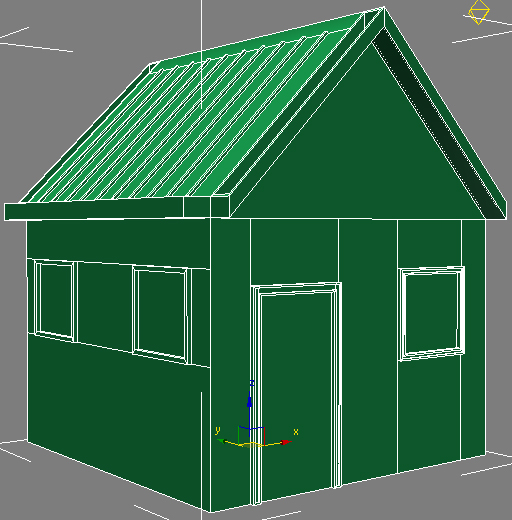

... from here... pwede ka na mag dadag ng texture, lighting etc... I hope it helped...
ingatz!!!
... this is a crash intro to Multi Sub Object Modeling via EDIT POLY...
... "Spare" muna natin ang details for Later...
... what is important is...
... magkaroon kayo ng "Workable Familiarization" sa EDIT POLY Modifier and its ROLLOUTS & R. CLICKS options...
... ok... Gambaru!!! Hajime!!!
(i included steps to use units para dun sa mga sanay sa units... pero di ako mag bibigay ng specific measurements
or values...remember... spare the details...)
1. Go to CUSTOMIZE, UNITS SET UP
(pumili ng units na kabisado mo...)


2. Go to CREATE, GEOMETRY, BOX

3. Click and drag to create
4. Go to the MODIFY panel, and adjust the MEASUREMENTS
(keep the segments to 1)
... be sensitive on the use of VIEW PORTS
(as you can see.. I shifted the view without mentioning it...)

5. Center the BOX via RIGHT CLICKING at the UCS SPINNERS

6. Change the BOX name to HOUSE

7. Go to the MODIFIERS List, choose EDIT POLY

8. Go to the SELECTION rollout, click EDGE selection
("CTRL CLICK" para ma- "MULTIPLE SELECT" yung 2 top edges at the front...)
(pwede mo din gain to sa front viewport... via click and drag)


9. RIGHT CLICK and choose CONNECT SETTINGS

10. Set the VALUE to 1 and press OK
(sa ngayon... 1 lang muna, later, pwede mong laruin ang mga values)

11. CTRL click on the VERTEX selection
(para slected pa din yung mga bagong vertex na created from the edge connection)

12. Drag up the selected vertices
(from here you can see, via PUSH or PULL of vertices, you can reshape the POLYGON...)

13. Select the 4 top corner vertices
14. RIGHT CLICK and choose CONNECT SETTINGS
(as you can see, pwede kang mag add ng detail via CONNECT commands)
(CONNECT command is only allowed to EDGES and VERTICES)

15. Click POLYGON selection

16. Select the ROOF polygon, RIGHT click, and choose EXTRUDE settings
(self discovery part na yung GROUP, LOCAL NORMAL, and BY POLYGON)

17. You can select NEWLY CREATED polygons and also apply EXTRUSION

18. You can also use other EDIT POLY settings like BEVEL, OUTLINE, INSET etc.
(again...self discovery part na tong mga to...)

19. You can further add POLYGONS via EDGE CONNECTIONS
and further add detail with other edit polygon settings


... from here... pwede ka na mag dadag ng texture, lighting etc... I hope it helped...
ingatz!!!

kunito- CGP Newbie

- Number of posts : 37
Age : 46
Location : Dubai, UAE
Registration date : 10/07/2009
 Re: Multi Sub Object Modeling: EDIT POLY
Sir Kunito, its huge help for all beginners....thanks for the simple tuts 


3DZONE- Cube Spinner

- Number of posts : 3834
Age : 49
Location : Abu Dhabi U.A.E.
Registration date : 20/12/2008
 Similar topics
» edit poly explained
» Help mga master sa poly modeling!
» "Basic" Character (Humanoid) modeling tutorial (BOX MODELING)
» help complicated object modeling
» Modeling, selecting edges of irregular shape poly
» Help mga master sa poly modeling!
» "Basic" Character (Humanoid) modeling tutorial (BOX MODELING)
» help complicated object modeling
» Modeling, selecting edges of irregular shape poly
Page 1 of 1
Permissions in this forum:
You cannot reply to topics in this forum|
|
|


