


Making Of Call It
+21
pangahas
yaug_03
corpsegrinder
ME_nesperos_27
aasm271
bokkins
ARCHITHEKTHURA
zdesign
kurdaps!
ERICK
Ed Lester
mammoo_03
TANKQ
Canadium
rtp_23
celes
nomeradona
Norman
rangalua
aeroll
lobsang rampa
25 posters
:: Tutorials :: Photoshop Tutorials
Page 3 of 3
Page 3 of 3 •  1, 2, 3
Making Of Call It
![]() by lobsang rampa Sun May 09, 2010 5:18 pm
by lobsang rampa Sun May 09, 2010 5:18 pm
First topic message reminder :
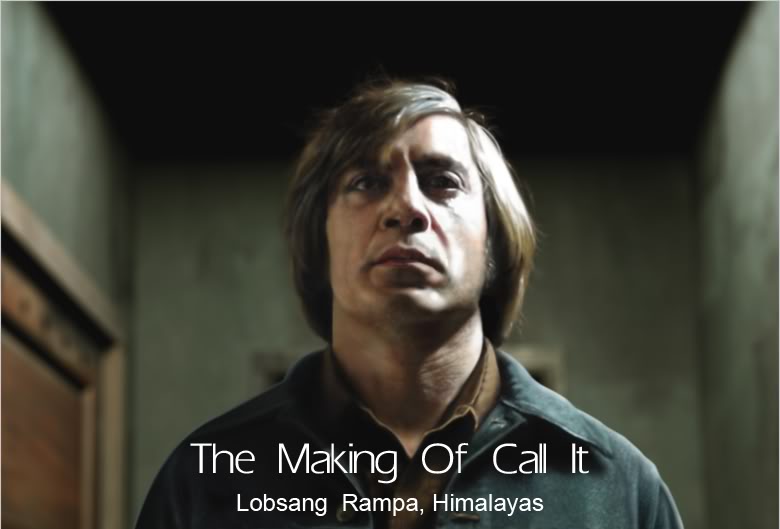
I was inspired to make a portrait of Anton Chigurh after watching No Country for Old Men. I don't know why but he just caught my interest and attention.
I'm new to digital painting and I still have a lot to learn. I thought this would be a good study to exercise my attention to details since I'm still learning the techniques. This is not the step by step tutorial, but will try to explain you how its done.
I usually start with rough white outlines on a tinted background. I then apply rough colors and rough details
until I come up with a rough study look with colors.
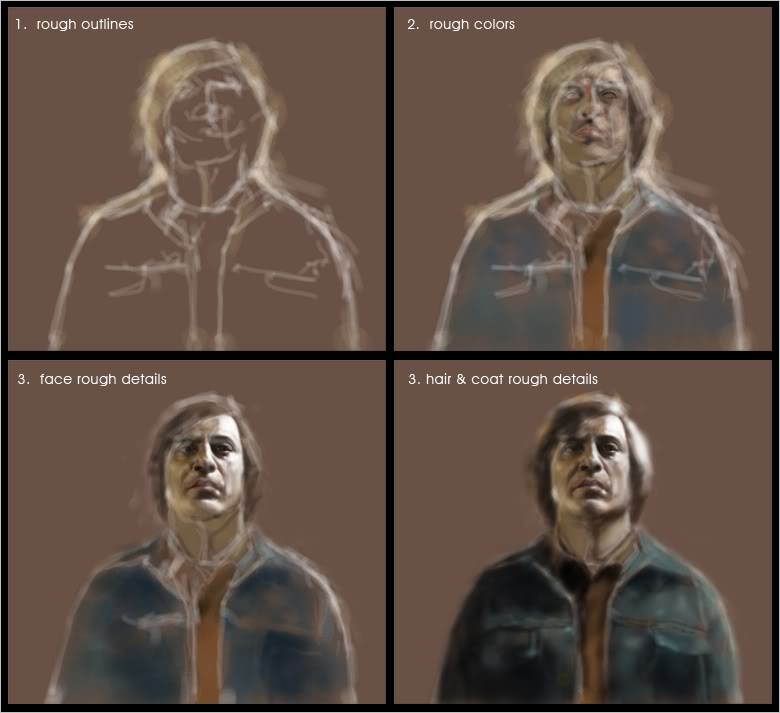
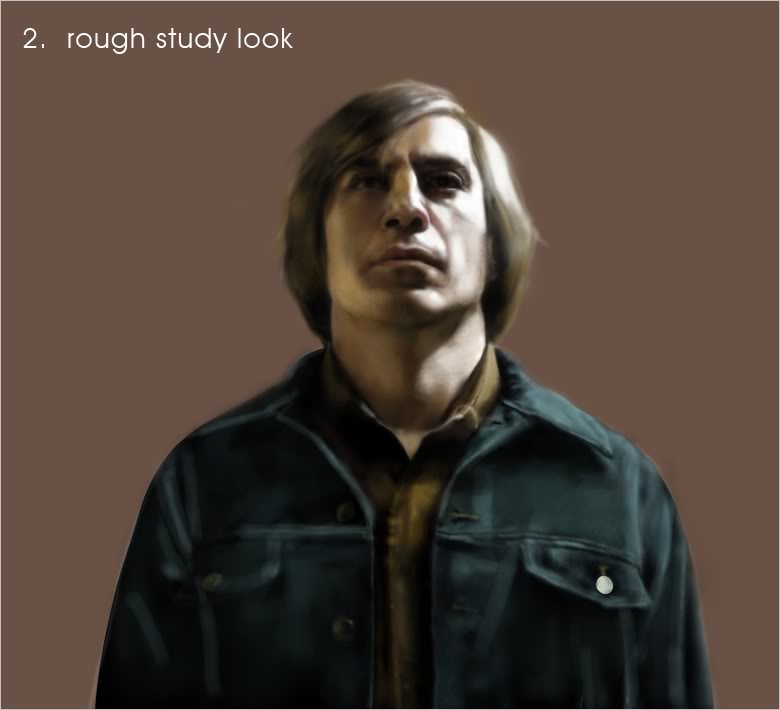
After cleaning out the outlines, I then proceed to paint the details of the face. I start with the reddish portion of the skin.
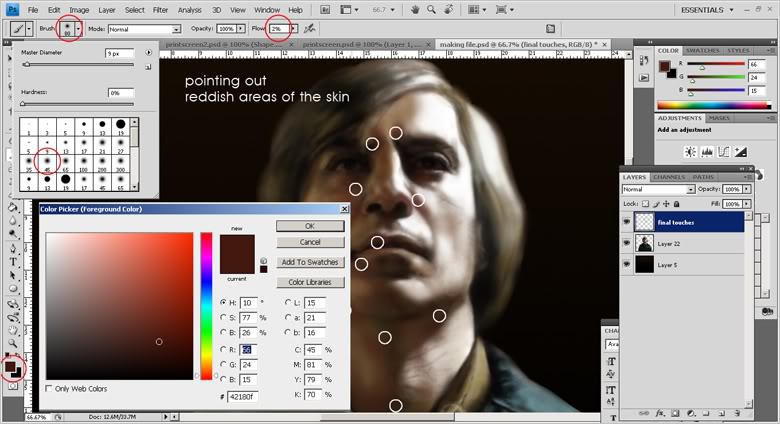
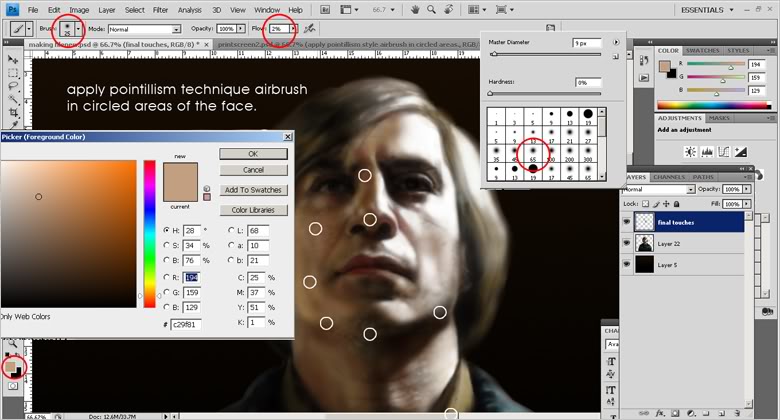
I then apply certain techniques like erratic airbrushing and pointillism to certain areas
to add realism and roughness of the skin tone.
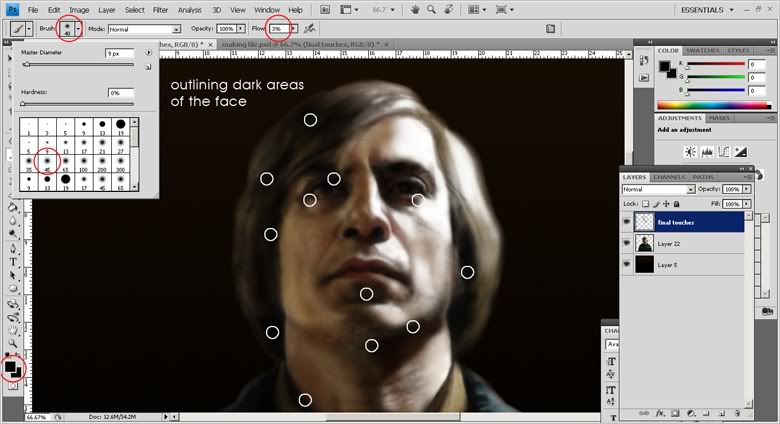
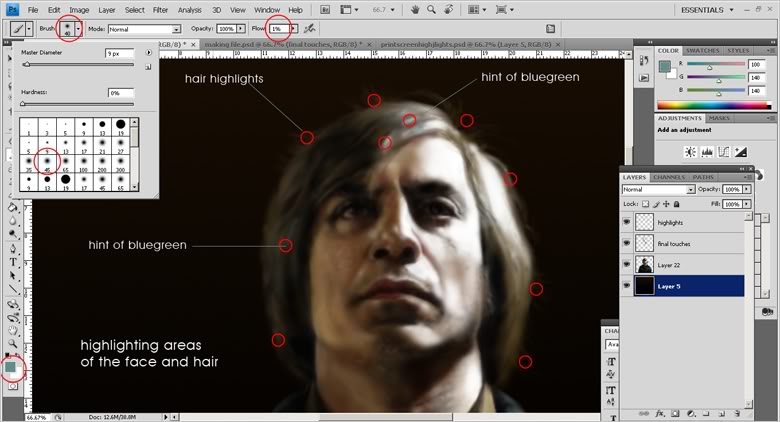
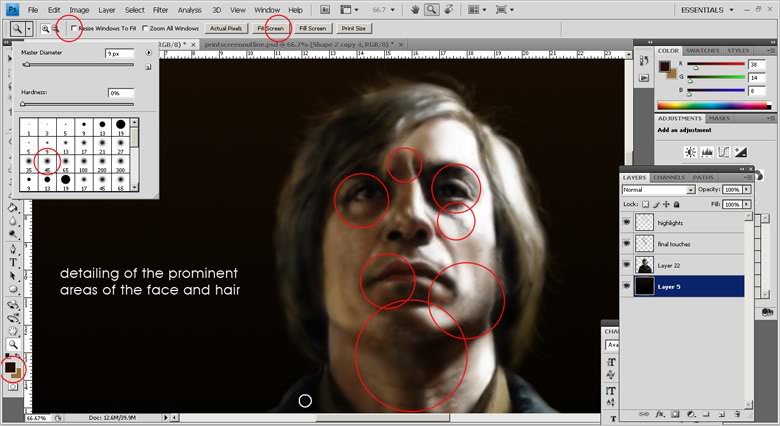
After I'm satisfied with the tone. I go back to enhancing dark outlines, highlighting and enhancing the details of both face
and hair. I make sure no areas are left unattended. This is the stage where I'm being careful. But one thing I love about
digital painting is being careful is still being careless compared to oil or watercolor painting.
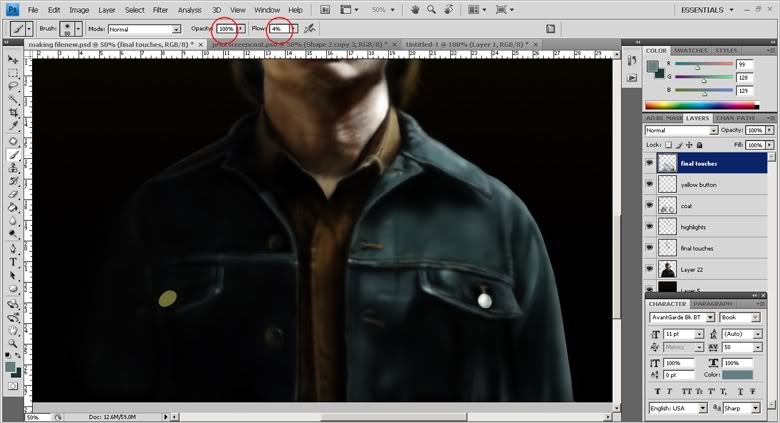
After I feel I'm done with the face, I proceed to the coat. I smoothen out the roughness by applying blending colors
in sharp areas while stating out the shady spots until I have a smooth and clean looking coat.
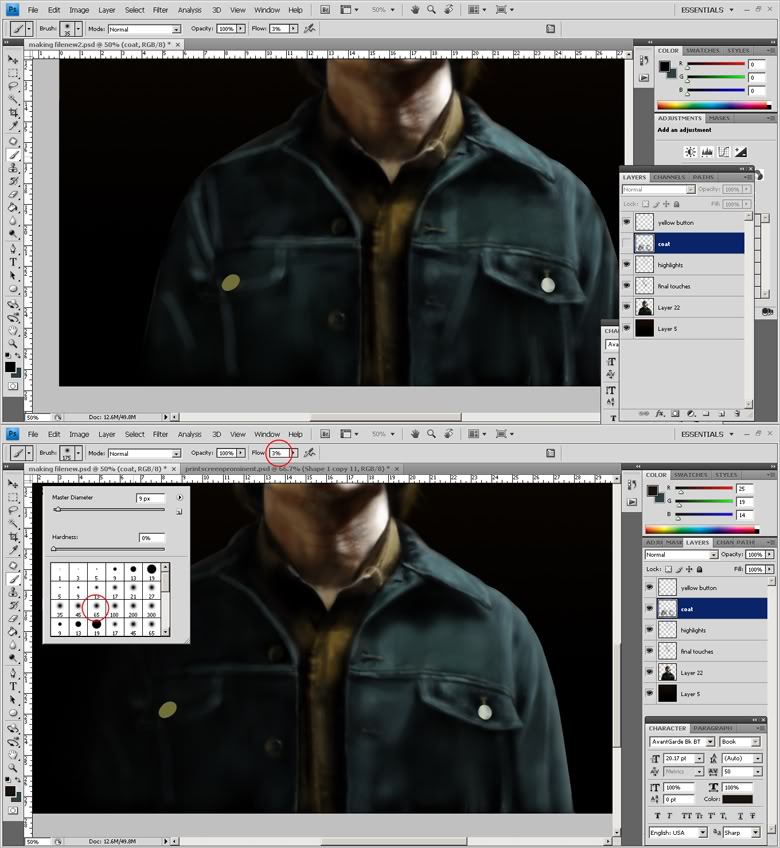
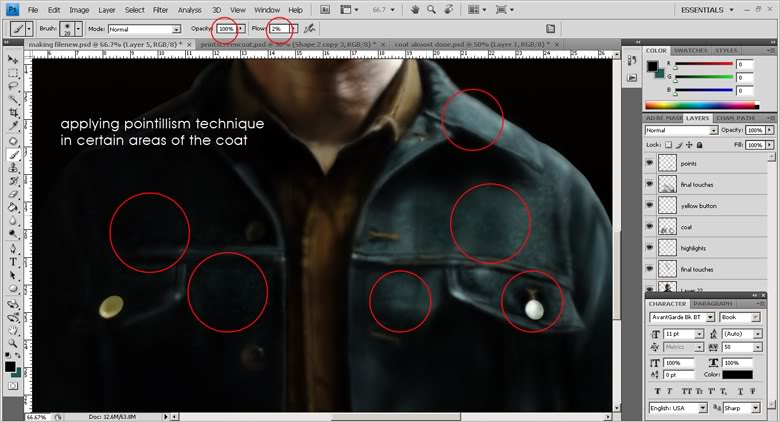
My approach in rendering the coat is similar to what I do to the face. I point out the outlines, enhance the details and
then apply erratic airbrushing and pointillism techniques to add realism and to make it look like fabric, so there must be a combination of strokes. Trust your instincts.
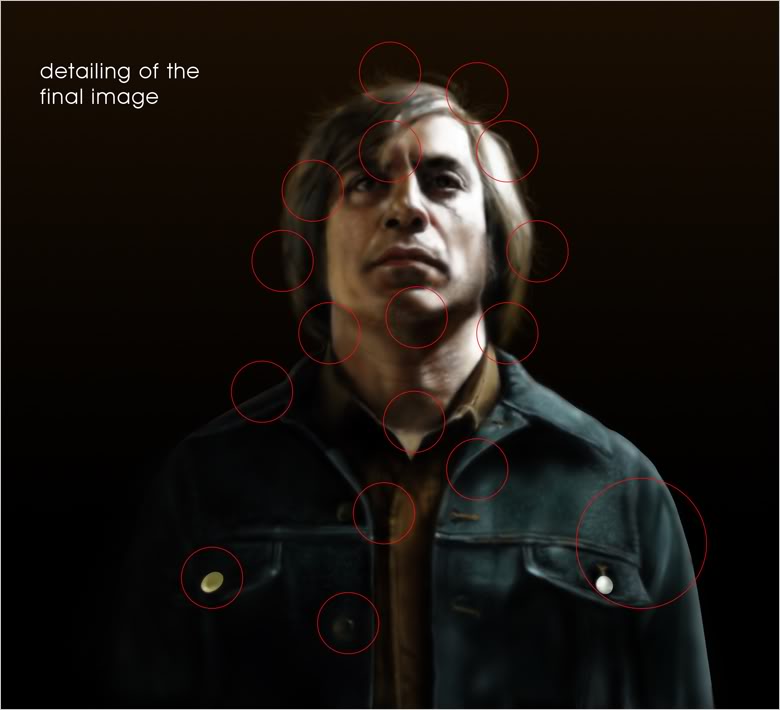
It's basically done by then. But I cannot help it. I have to enhance the final image and make sure it looks good and convincing.
I study the reference photo carefully for the last time and look at the image I made. I then point out the areas that need to
be worked on and work on them until I'm sick and tired of looking and working on the image. When I feel it's done. It's done.
For the background, I render a simple scene in Maya using Mental Ray.
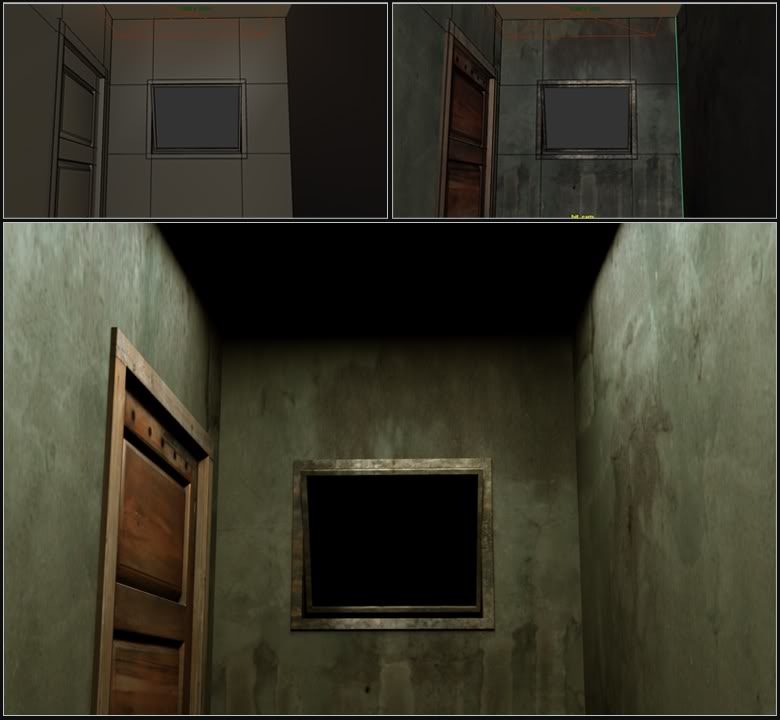
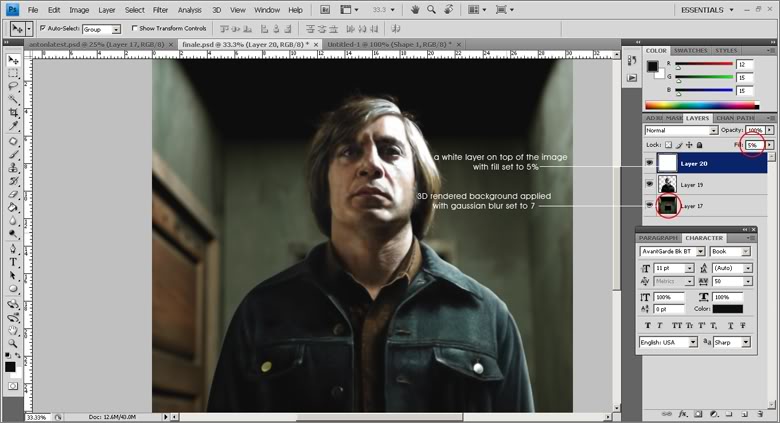
The rendered image is then applied with gaussian blur set to 7, incorporate it with the artwork,
put an all white layer on top of it, set the fill to 5% to add a washed up photo look.
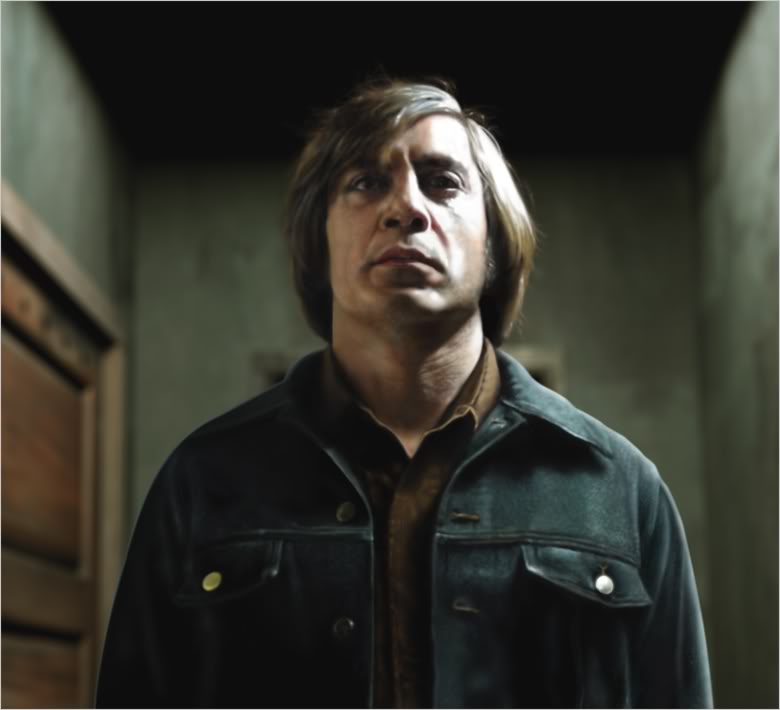
Now I have my digital artwork. Thank you! I hope nakatulong instead of naka-asar. Call it.
I was inspired to make a portrait of Anton Chigurh after watching No Country for Old Men. I don't know why but he just caught my interest and attention.
I'm new to digital painting and I still have a lot to learn. I thought this would be a good study to exercise my attention to details since I'm still learning the techniques. This is not the step by step tutorial, but will try to explain you how its done.
I usually start with rough white outlines on a tinted background. I then apply rough colors and rough details
until I come up with a rough study look with colors.
After cleaning out the outlines, I then proceed to paint the details of the face. I start with the reddish portion of the skin.
I then apply certain techniques like erratic airbrushing and pointillism to certain areas
to add realism and roughness of the skin tone.
After I'm satisfied with the tone. I go back to enhancing dark outlines, highlighting and enhancing the details of both face
and hair. I make sure no areas are left unattended. This is the stage where I'm being careful. But one thing I love about
digital painting is being careful is still being careless compared to oil or watercolor painting.
After I feel I'm done with the face, I proceed to the coat. I smoothen out the roughness by applying blending colors
in sharp areas while stating out the shady spots until I have a smooth and clean looking coat.
My approach in rendering the coat is similar to what I do to the face. I point out the outlines, enhance the details and
then apply erratic airbrushing and pointillism techniques to add realism and to make it look like fabric, so there must be a combination of strokes. Trust your instincts.
It's basically done by then. But I cannot help it. I have to enhance the final image and make sure it looks good and convincing.
I study the reference photo carefully for the last time and look at the image I made. I then point out the areas that need to
be worked on and work on them until I'm sick and tired of looking and working on the image. When I feel it's done. It's done.
For the background, I render a simple scene in Maya using Mental Ray.
The rendered image is then applied with gaussian blur set to 7, incorporate it with the artwork,
put an all white layer on top of it, set the fill to 5% to add a washed up photo look.
Now I have my digital artwork. Thank you! I hope nakatulong instead of naka-asar. Call it.
Last edited by lobsang rampa on Tue May 11, 2010 8:54 pm; edited 3 times in total

lobsang rampa- CGP Apprentice

- Number of posts : 405
Age : 46
Location : Hostile Jungles of Mindanao
Registration date : 13/09/2009 -

Re: Making Of Call It
![]() by kamaynicain Wed May 12, 2010 1:07 pm
by kamaynicain Wed May 12, 2010 1:07 pm
walang ka duda duda, kung magaling sa traditional art which is a good foundation...pagdating sa digital painting mas lalong magaling din...too much dedication for this guy on his art and on this org....I SALUTE YOU SIR!
kamaynicain- CGP Newbie

- Number of posts : 88
Registration date : 25/01/2010
:)
![]() by meowlife Thu May 13, 2010 8:38 pm
by meowlife Thu May 13, 2010 8:38 pm
Proud of you ED!!! Padayon sa imo mga damgo ug inspirasyon... Way to go....!!
meowlife- CGP Newbie
- Number of posts : 8
Age : 43
Location : dgte city
Registration date : 09/11/2009
Re: Making Of Call It
![]() by akoy Fri May 14, 2010 3:33 am
by akoy Fri May 14, 2010 3:33 am
nakakamangha talaga master  100x thumbs up dapat
100x thumbs up dapat
akoy- CGP Guru

- Number of posts : 1929
Age : 38
Location : aparri
Registration date : 01/09/2009
lobsang rampa- CGP Apprentice
- Number of posts : 405
Age : 46
Location : Hostile Jungles of Mindanao
Registration date : 13/09/2009 -
Page 3 of 3 • 1, 2, 3
» Call It.
» VFX, ek ek, whatever you call it.
» Call Center
» Call of Duty 4
» 2ND Pampanga EB sa December (between Christmas and New year)
» VFX, ek ek, whatever you call it.
» Call Center
» Call of Duty 4
» 2ND Pampanga EB sa December (between Christmas and New year)
:: Tutorials :: Photoshop Tutorials
Page 3 of 3
Permissions in this forum:
You cannot reply to topics in this forum|
|
|