Adding Water Features in Photoshop
+15
smileybatara
uwak
corpsegrinder
qcksilver
Ernest
ortzak
Muggz
egypt
moothe
bokkins
nomeradona
deosrock
bongskeigle
markitekdesign
render master
19 posters
:: Tutorials :: Photoshop Tutorials
Page 1 of 2
Page 1 of 2 • 1, 2 
 Adding Water Features in Photoshop

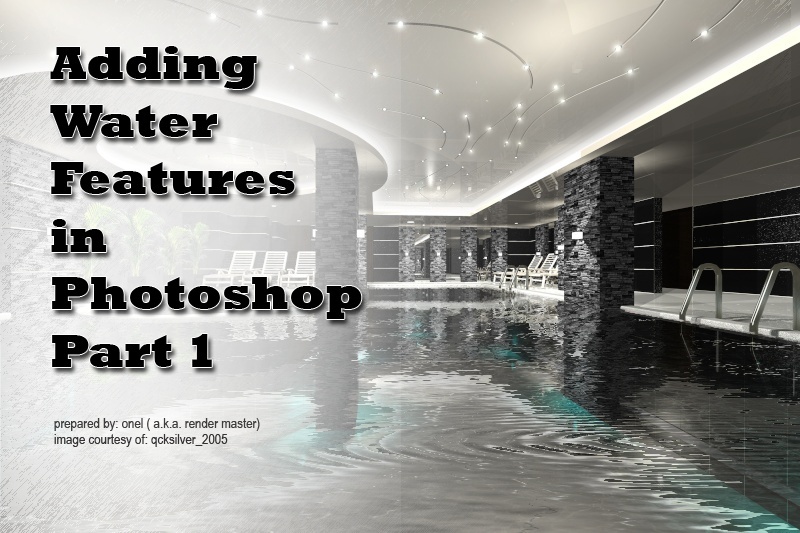
When there's no other way and photoshop is the only choice to add water features to your scene, then this method will help you a lot. I will be using a plug-ins called FLOOD by Flaming Fear. FLOOD Download (demo only)
The image i used on this tutorial was from qcksilver_2005 and egypt


Last edited by render master on Sat Feb 20, 2010 3:20 pm; edited 1 time in total

render master- Game Master

- Number of posts : 3274
Age : 104
Location : riyadh, saudi arabia
Registration date : 27/09/2008
 Re: Adding Water Features in Photoshop
What it does
Flood creates bodies of lying water in pictures. It provides control over waves, a radiating ripple, the perspective and color of the water, and the clarity of reflections. Although it's a 2-D effect, with just a little effort it can produce some convincing results with a 3-D look.
INTERFACE
1. View
Flood draws a plane of water at the bottom of the picture, and the water reflects whatever's in the top of the picture. These controls determine your view of the plane of water that Flood draws.
Horizon - places the horizon; 0 is at the top of the picture and 100 is at the bottom. In the preview, the horizon shows as a dotted green line. For the most credible results you should align Flood's horizon with the real horizon in the picture.
Offset - sets the location of the line about which reflections occur. In the preview, the offset shows as a dotted pink line. Offsets greater than zero prevent the water from being drawn all the way out to the horizon. This is useful when you either want water only in the foreground, or when you want to have forground objects partly submerged and correctly reflected. Instructions on how to accomplish this effect appear later in this guide.

Perpsective sets the steepness of the perspective of the water's wavy surface. It's for matching the perspective in a wide- or narrow-angle lens.
Altitude moves the camera up and down. Used together with Perspective, you can produce a view of the waves that is compatible with your original image.
2. Waves -These controls change the appearance of the waves.
Waviness sets the height of the waves. Zero gives a perfectly calm surface.
Complexity ranges from smooth, rolling waves to harsh choppy seas.

Brilliance sets how bright the reflections are. Zero gives dark, coffee-like water. 42 is usually a realistic watery appearance. 100 gives the total shininess of liquid mercury.
Blur makes the reflections grow blurry in the foreground. Use this to discard distracting detail in the reflections, or turn the waves off and the blur up to produce a frosted-mirror effect.
The Color Button sets the color of the water itself, which shows through in the foreground. Black and midnight blue work best.
3. Ripple - The water can have a circular ripple, as if a stone were dropped into it. Click in the preview anywhere below the dotted-green Horizon line to get the ripple. Click above the line to remove the ripple.
Size sets the ripple's size. The ripple will shrink in the distance. However, this setting is the neither strictly the size of ripple in the scene, nor the size of the ripple onscreen. It's an arbitrary measure that's meant to be easy to use rather than physically consistent.
Height sets how strong the ripple is.
Undulation sets how many wave cycles are in the ripple. High numbers give a more complex appearance.
Flood creates bodies of lying water in pictures. It provides control over waves, a radiating ripple, the perspective and color of the water, and the clarity of reflections. Although it's a 2-D effect, with just a little effort it can produce some convincing results with a 3-D look.
INTERFACE
1. View
Flood draws a plane of water at the bottom of the picture, and the water reflects whatever's in the top of the picture. These controls determine your view of the plane of water that Flood draws.
Horizon - places the horizon; 0 is at the top of the picture and 100 is at the bottom. In the preview, the horizon shows as a dotted green line. For the most credible results you should align Flood's horizon with the real horizon in the picture.
Offset - sets the location of the line about which reflections occur. In the preview, the offset shows as a dotted pink line. Offsets greater than zero prevent the water from being drawn all the way out to the horizon. This is useful when you either want water only in the foreground, or when you want to have forground objects partly submerged and correctly reflected. Instructions on how to accomplish this effect appear later in this guide.

Perpsective sets the steepness of the perspective of the water's wavy surface. It's for matching the perspective in a wide- or narrow-angle lens.
Altitude moves the camera up and down. Used together with Perspective, you can produce a view of the waves that is compatible with your original image.
2. Waves -These controls change the appearance of the waves.
Waviness sets the height of the waves. Zero gives a perfectly calm surface.
Complexity ranges from smooth, rolling waves to harsh choppy seas.

Brilliance sets how bright the reflections are. Zero gives dark, coffee-like water. 42 is usually a realistic watery appearance. 100 gives the total shininess of liquid mercury.
Blur makes the reflections grow blurry in the foreground. Use this to discard distracting detail in the reflections, or turn the waves off and the blur up to produce a frosted-mirror effect.
The Color Button sets the color of the water itself, which shows through in the foreground. Black and midnight blue work best.
3. Ripple - The water can have a circular ripple, as if a stone were dropped into it. Click in the preview anywhere below the dotted-green Horizon line to get the ripple. Click above the line to remove the ripple.
Size sets the ripple's size. The ripple will shrink in the distance. However, this setting is the neither strictly the size of ripple in the scene, nor the size of the ripple onscreen. It's an arbitrary measure that's meant to be easy to use rather than physically consistent.
Height sets how strong the ripple is.
Undulation sets how many wave cycles are in the ripple. High numbers give a more complex appearance.

render master- Game Master

- Number of posts : 3274
Age : 104
Location : riyadh, saudi arabia
Registration date : 27/09/2008
 Re: Adding Water Features in Photoshop
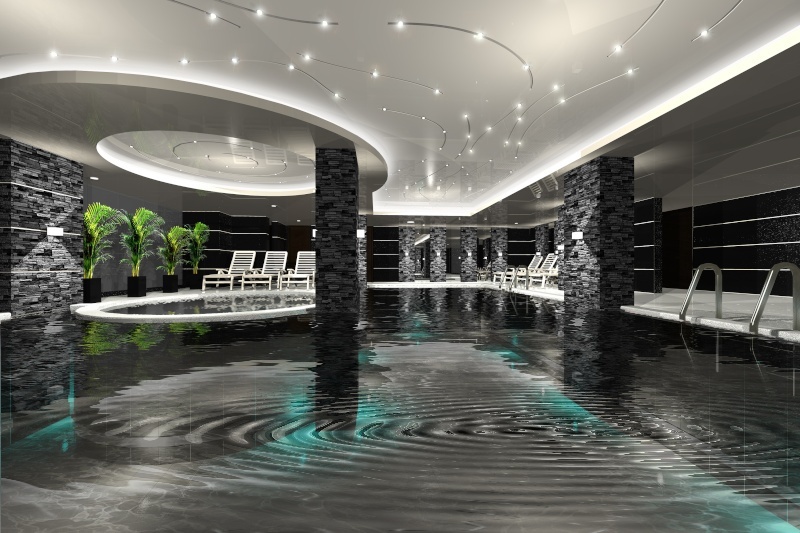
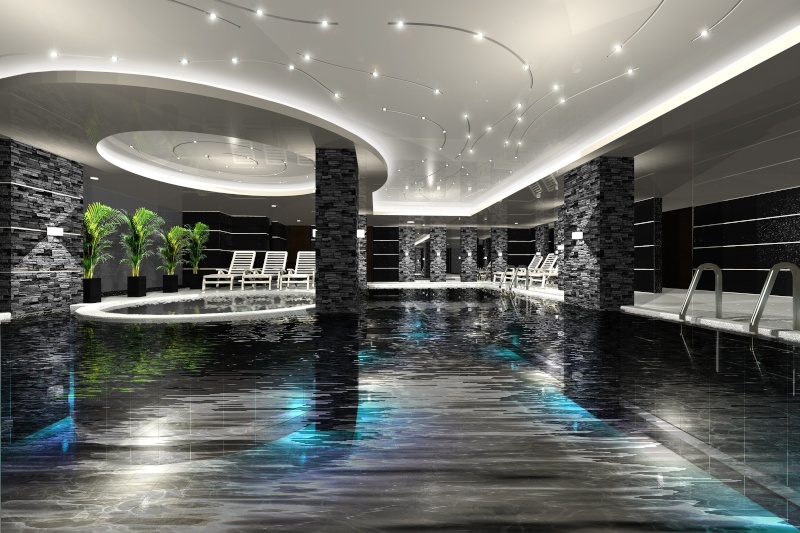
Since i have no reference for the tiling on the bottom of the pools, i just pick up the second rendered image. Cut it out and overlay it on the scene.

And now here is the firs settings

And the inputs - final 1, set its fill / opacity to 64%

With the procedures, you can create a numbers of different output in just a minute. Here are some more samples.


Hope it helps....good luck
File sample in photoshop ( w/o the plugins) -PSD FILES
And here is another sample
Image courtesy of egypt
Original picture

Water Added


And now here is the firs settings

And the inputs - final 1, set its fill / opacity to 64%

With the procedures, you can create a numbers of different output in just a minute. Here are some more samples.


Hope it helps....good luck
File sample in photoshop ( w/o the plugins) -PSD FILES
And here is another sample
Image courtesy of egypt
Original picture

Water Added

Last edited by render master on Sat Feb 20, 2010 11:29 pm; edited 1 time in total

render master- Game Master

- Number of posts : 3274
Age : 104
Location : riyadh, saudi arabia
Registration date : 27/09/2008
 Re: Adding Water Features in Photoshop
galeng nito bro...thanks for sharing this....can i post also this one to revit pinoy photoshop tutorial?http://revitpinoy.darkbb.com/adobe-photoshop-f25/
 Re: Adding Water Features in Photoshop
thanks sir rendermaster for sharing this...ang husay...

bongskeigle- CGP Guru

- Number of posts : 1958
Age : 41
Location : Zebu
Registration date : 06/05/2009
 Re: Adding Water Features in Photoshop
markitekdesign wrote:galeng nito bro...thanks for sharing this....can i post also this one to revit pinoy photoshop tutorial?http://revitpinoy.darkbb.com/adobe-photoshop-f25/
no problem, you have my permision.
Last edited by render master on Sat Feb 20, 2010 11:05 pm; edited 1 time in total

render master- Game Master

- Number of posts : 3274
Age : 104
Location : riyadh, saudi arabia
Registration date : 27/09/2008
 Re: Adding Water Features in Photoshop
Nice one onel! galing nito. add ko lang, for still water, a subtle wave just to distort the reflection will do. But this is very helpful already! keep em coming. 

 Re: Adding Water Features in Photoshop
galing nito sir onel....husay mo talaga pag dating sa water.... 


moothe- CGP Apprentice

- Number of posts : 489
Age : 40
Location : cebu, philippines/ kolkata,india
Registration date : 21/06/2009
 Re: Adding Water Features in Photoshop
galing sir. subukan ko nga mag install ng photoshop. sketchup at max lang kc alam kong gamitin e.

egypt- CGP Newbie

- Number of posts : 134
Age : 39
Location : sa bundok na may maraming pinetree
Registration date : 04/10/2009
 Re: Adding Water Features in Photoshop
mahusay iyong plug-inns hindi ako hehhe. salamat sir sa pagdaanmoothe wrote:galing nito sir onel....husay mo talaga pag dating sa water....

render master- Game Master

- Number of posts : 3274
Age : 104
Location : riyadh, saudi arabia
Registration date : 27/09/2008
 Re: Adding Water Features in Photoshop
nyeeee hehehe... salamat. just sharing langnomeradona wrote:wow excellent tutorial. thanks to you ronel.
bokkins wrote:Nice one onel! galing nito. add ko lang, for still water, a subtle wave just to distort the reflection will do. But this is very helpful already! keep em coming.
oo nga sir, pang madalian kapag ala ng time magrender.

render master- Game Master

- Number of posts : 3274
Age : 104
Location : riyadh, saudi arabia
Registration date : 27/09/2008

Muggz- CGP Guru

- Number of posts : 1569
Age : 41
Location : Zaragosa City/Sazi's Bar
Registration date : 03/02/2009
 Re: Adding Water Features in Photoshop
another sample from corpsgrinder image
orignal image

added / revised water features

orignal image

added / revised water features


render master- Game Master

- Number of posts : 3274
Age : 104
Location : riyadh, saudi arabia
Registration date : 27/09/2008
 Re: Adding Water Features in Photoshop
Thanks for sharing sir. I'm newbie here super galing ng mga master!!. 


Ernest- CGP Apprentice

- Number of posts : 508
Age : 41
Location : Quezon City
Registration date : 20/02/2010
 Re: Adding Water Features in Photoshop
you are very much welcome here sir. enjoy your stayErnest wrote:Thanks for sharing sir. I'm newbie here super galing ng mga master!!.

render master- Game Master

- Number of posts : 3274
Age : 104
Location : riyadh, saudi arabia
Registration date : 27/09/2008
 Re: Adding Water Features in Photoshop
galing naman render master,,try ko mamaya sa bahay,,salamat sa pagshare

qcksilver- CGP Guru

- Number of posts : 1940
Age : 42
Location : bahrain/pampanga
Registration date : 08/02/2010
 Re: Adding Water Features in Photoshop
nice tut sir... its cool kasi if you're not satisfied with your water in your render, you can easily enhance it.. tnx! 


corpsegrinder- CGP Guru

- Number of posts : 1423
Age : 39
Location : Zamboanga City
Registration date : 12/02/2009
 Re: Adding Water Features in Photoshop
render master wrote:markitekdesign wrote:galeng nito bro...thanks for sharing this....can i post also this one to revit pinoy photoshop tutorial?http://revitpinoy.darkbb.com/adobe-photoshop-f25/
no problem, you have my permision.
salamat sir...atleast may back up tayo sakali...

 Re: Adding Water Features in Photoshop
ang bangis mo sir...galing more pa sir...

smileybatara- CGP Newbie

- Number of posts : 107
Age : 32
Location : philippines
Registration date : 22/08/2009
 Re: Adding Water Features in Photoshop
napahanga na naman ako,hehehe

quilop- CGP Newbie

- Number of posts : 57
Age : 37
Location : philippine
Registration date : 09/03/2010
Page 1 of 2 • 1, 2 
:: Tutorials :: Photoshop Tutorials
Page 1 of 2
Permissions in this forum:
You cannot reply to topics in this forum


