simple office bldg._Photomatch_(w/ konting tutorial)
+58
qnald
jandy
christiange
mez
zdesign
donskiekong
BUNAKIDDz
bartsimpson
lemeuix
archaos
marcelinoiii
jomzkie23
lloydi
one9dew
ralph_soriano
skyscraper100
darrelljay
ytsejeffx
remlex
boyet62
mechanic
AJ Cortez
reggie0711
bakugan
arkiedmund
torring
AUSTRIA
patz_28
Tracer
revtrax
pixelburn
Alapaap
bluedevil
3dpjumong2007
icefrik19
ERICK
Butz_Arki
epjarchitect
pedio84
snow_blind
m | 9 z
Yhna
kurdaps!
deosrock
atoyzky01
theomatheus
arki_vhin
A.K.A.
scorpion21
rangalua
v_wrangler
bokkins
balongeisler
mcgoogles
dreffyves3d
yaug_03
nomeradona
jarul
62 posters
:: 3d Gallery :: Exteriors
Page 1 of 4
Page 1 of 4 • 1, 2, 3, 4 
 simple office bldg._Photomatch_(w/ konting tutorial)
paramdam lng,,,
mdaliang work,
ginawa ko knna hapon sa office.
office bldg sa isang pabrika ng mga karton dito sa davao.
photomatch daw,,,on going na po eto,,pro ang daming changes,lalo na sa mga rooms sa loob,,
kaya nag iba po ung mga windows...render lng po sa akin...
pki cc po bossing...
actual pic
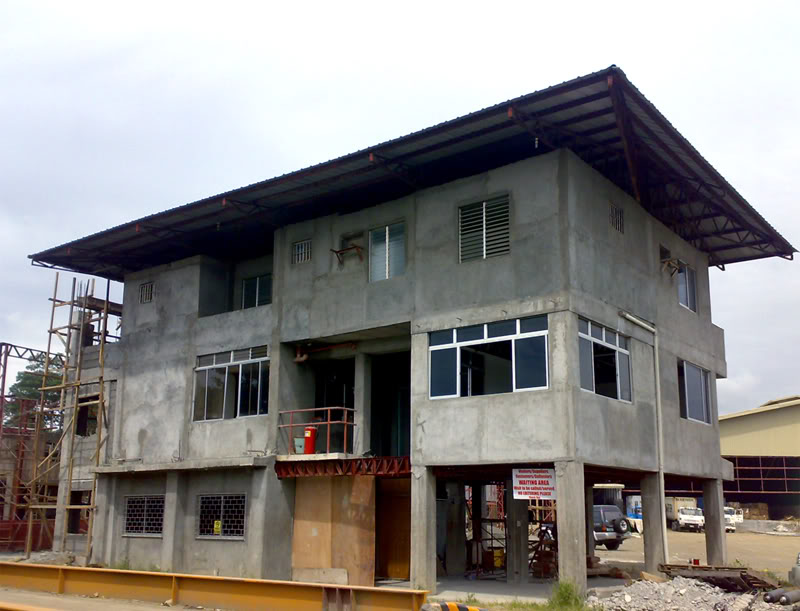
photomatch na daw.
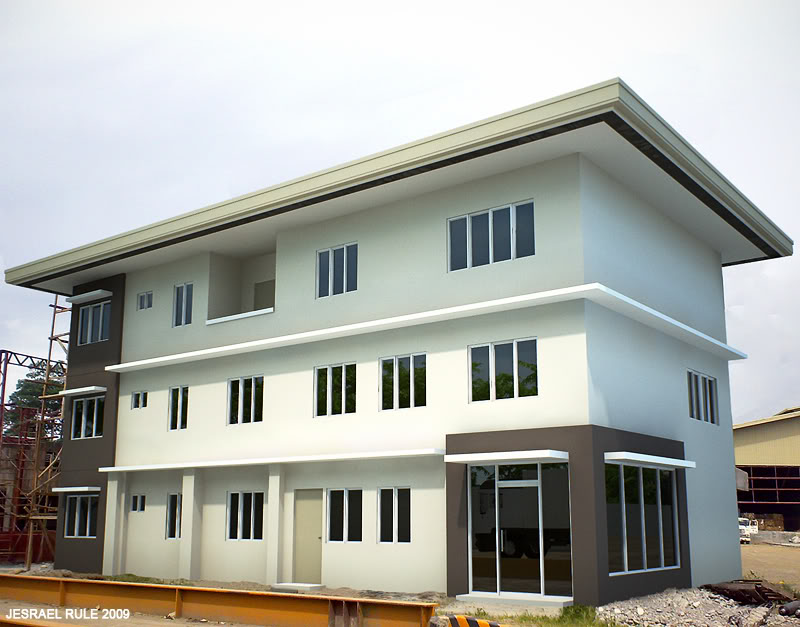
slamat po...
mdaliang work,
ginawa ko knna hapon sa office.
office bldg sa isang pabrika ng mga karton dito sa davao.
photomatch daw,,,on going na po eto,,pro ang daming changes,lalo na sa mga rooms sa loob,,
kaya nag iba po ung mga windows...render lng po sa akin...
pki cc po bossing...
actual pic

photomatch na daw.

slamat po...
Last edited by jarul on Thu May 13, 2010 4:57 pm; edited 2 times in total
 Re: simple office bldg._Photomatch_(w/ konting tutorial)
galing ng matching, gumawa ka na ba ng tutorial about this?

yaug_03- CGP Guru

- Number of posts : 1911
Age : 41
Location : Cainta,Rizal
Registration date : 05/07/2009
 Re: simple office bldg._Photomatch_(w/ konting tutorial)
swak na swak....galing talaga! 


dreffyves3d- CGP Apprentice

- Number of posts : 344
Age : 41
Location : dubai/cebu
Registration date : 08/09/2009
 Re: simple office bldg._Photomatch_(w/ konting tutorial)
salmat po mga sir
post ko ung screenshots nxt week sir,,nasa office kac ang file neto,,,try ko din explain kugn ano ung ginawa ko..
hndi lng talaga ako marunong gumwa ng tutorial sir..
salamat po sir.....
yaug_03 wrote:galing ng matching, gumawa ka na ba ng tutorial about this?
post ko ung screenshots nxt week sir,,nasa office kac ang file neto,,,try ko din explain kugn ano ung ginawa ko..
hndi lng talaga ako marunong gumwa ng tutorial sir..
salamat po sir.....
 Re: simple office bldg._Photomatch_(w/ konting tutorial)
uie master, galing mo talaga... paturo... 
dami mo na pera master.. hehe

dami mo na pera master.. hehe

mcgoogles- CGP Apprentice

- Number of posts : 740
Age : 33
Location : Davao City, Philippines
Registration date : 12/03/2009
 Re: simple office bldg._Photomatch_(w/ konting tutorial)
mcgoogles wrote:uie master, galing mo talaga... paturo...
dami mo na pera master.. hehe
balongeisler wrote:linis ja.galing talaga.
salamat po mga bossing....
 Re: simple office bldg._Photomatch_(w/ konting tutorial)
galing ng photomatch ah. 
naku ang daming change order to. patay... haha.

naku ang daming change order to. patay... haha.
 Re: simple office bldg._Photomatch_(w/ konting tutorial)
bokkins wrote:galing ng photomatch ah.
naku ang daming change order to. patay... haha.
mdyo dami nga sir boks,,hehe,,salamat po.....
 Re: simple office bldg._Photomatch_(w/ konting tutorial)
anggaling nitong si jarul sa matching - no complaints - I like your play of lights, shadow direction and density so I have no further comment but to ask where you work 
Did you model everything and light in max/vray?
Did you model everything and light in max/vray?
 Re: simple office bldg._Photomatch_(w/ konting tutorial)
Very nice Sir, kahit saan magaling ka talaga...Lupet 

 Re: simple office bldg._Photomatch_(w/ konting tutorial)
galing naman,,paturu naman dyan,,,

scorpion21- CGP Apprentice

- Number of posts : 769
Age : 78
Location : PI
Registration date : 28/06/2009
 Re: simple office bldg._Photomatch_(w/ konting tutorial)
abangan ko tutorial nito  from where did you make the photomatch? from max or photoshop?
 from where did you make the photomatch? from max or photoshop?
A.K.A.- CGP Apprentice

- Number of posts : 350
Age : 49
Location : Earth
Registration date : 25/10/2009
 Re: simple office bldg._Photomatch_(w/ konting tutorial)
grabe dameng revise nito sa actual...
sa render may masasabi pa ba ko....hehehe
sa render may masasabi pa ba ko....hehehe

arki_vhin- CGP Dabarkads

- Number of posts : 2172
Age : 38
Location : batang caloocan, tinapon sa SG
Registration date : 21/09/2008
 Re: simple office bldg._Photomatch_(w/ konting tutorial)
holy shit man!!!!!galing mo 


theomatheus- CGP Guru

- Number of posts : 1387
Age : 41
Location : planet obsidian panopticon
Registration date : 06/07/2009
 Re: simple office bldg._Photomatch_(w/ konting tutorial)
v_wrangler wrote:anggaling nitong si jarul sa matching - no complaints - I like your play of lights, shadow direction and density so I have no further comment but to ask where you work
Did you model everything and light in max/vray?
sir v,,slamat po at nagustuhan nyo po..
dito lng po ako sa davao city ngwowork,,sa tabi-tabi,,
sa cad po yan minodel..
ngprapractice pa rin sa max modeling..
ung lighting namn sa max vray na po sir.
finale po sa ps..
salamat po ...
 Re: simple office bldg._Photomatch_(w/ konting tutorial)
A.K.A. wrote:abangan ko tutorial nitofrom where did you make the photomatch? from max or photoshop?
wahh,,,hndi po cgro tutorial yun,,,mga screenshots lng and some explanations daw,,hindi po talaga ako marunong gumawa ng tutorial..
sa max palang po dapat magmatch na ung 3dmodel sa actual bg ..
sa ps na po ang finale...dun na po i aadjust (noise,blur,colorbalance,contrast etc).
salamat po..
 Re: simple office bldg._Photomatch_(w/ konting tutorial)
hnd naman sir,,salamat porangalua wrote:Very nice Sir, kahit saan magaling ka talaga...Lupet
post ko po some screenchots,,baka makatulong po iyon ng kaunti..scorpion21 wrote:galing naman,,paturu naman dyan,,,
master..hehe.salamat..ngppyaman ka nanaman dyan noh???arki_vhin wrote:grabe dameng revise nito sa actual...
sa render may masasabi pa ba ko....hehehe
 Re: simple office bldg._Photomatch_(w/ konting tutorial)
theomatheus wrote:holy shit man!!!!!galing mo
salamat po sir,,,
 Re: simple office bldg._Photomatch_(w/ konting tutorial)
galing galing nito sir the best 


atoyzky01- CGP Apprentice

- Number of posts : 326
Age : 43
Location : singapore
Registration date : 18/02/2009
 Re: simple office bldg._Photomatch_(w/ konting tutorial)
-abangan ko mga screen shots nito sir, pati konting tutorial na rin! 

 Re: simple office bldg._Photomatch_(w/ konting tutorial)
hi peeps..eto na po ung munting tutorial daw about sa exterior photomatch na ginawa ko..ewan ko kung may mapupulot kau dito.
anyway sana may maitulong eto kahit kaunti.
pag pasesyahan nyo na ang mga palpak dito,,1st time kc na gumawa ng munting tutes..
feel free na e-correct ang mga mali..
kung meron naman kaung additional inputs,,mas ok po..
eto na po.....
BACKGROUND SET-UP
1. make 2 copies of the actual photo in photoshop (for background), one for test render and one for final render.
2. for the test render background at least 400x311(usual test render output ko), and for final render background 1500x1167..
3. go to environment map (press 8) use the test render background ..then press alt+b and check USE ENVIRONMENT BACKGROUND & DISPLAY BACKGROUND so that you can see the background in your viewport..

CAMERA SET-UP
4.create a camera. Find a good angle that will match your model to the actual photo.(mano2x po ung sa akin ha).


5. Create a plane,apply ground map that somehow matches the ground in the actual photo. this will serve as ground reflection in the glass(in my case may glass kase up to floor sa entry sa area kaya naglagay ako) ..create a box ,place it in front and in the side. This will serve as a fence reflection in the glass. I Also created a small box in front, it will serve as the reflection of a small bridge (see actual photo).

6. create a plane,bend it using bend modifier and apply a sky map, (for sky reflections in the glass)
Add trees and other entourage for additional reflections.

LIGHTING
7.place a vray sun (eto kac gamit ko)..it is very important that you know the sun’s position in the actual photo.. (in my case nag base ako sa shadows sa actual photos).
Then place now the vray sun where you think that will match the sun’s position in the actual photo.
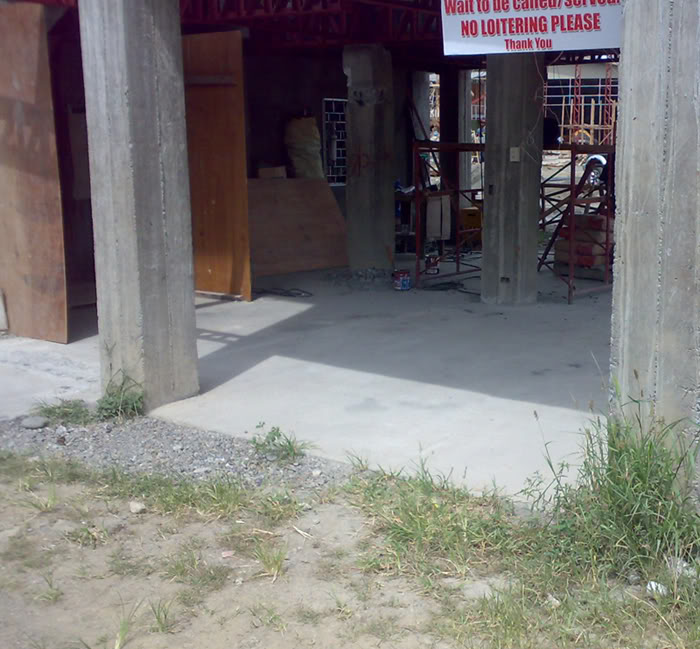


TEST RENDER…….
8. for the test render,go to frame buffer (eto kac gamit ko) set the output size same with the size of the bitmap the you used in the environment map. (test render background 400x311)..

Load your test render settings.
Hit render…..
9. play/adjust sun’s intensity until you get the right lighting that you think will match background.
FINAL RENDER…..
10. now change the bitmap (test render background) that you used environment map, replace it with the final render background for a higher resolution(sa akin 1500x1167).
11. load your final render settings.
set the final render output size same with size of the image background environment map.

Hit render….
12. I rendered two images..normal render and a dirt pass render.
13. save the final output as png format so that in photoshop we will just easily insert the background.
POST PRO in PHOTOSHOP….
14. my final render ouput in png format.
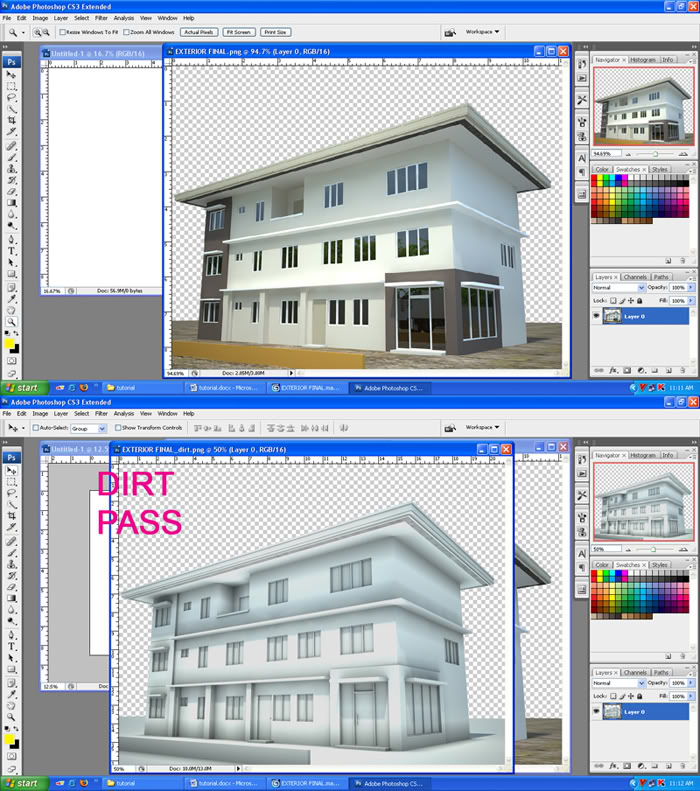
14. copy and paste the dirt pass render to the normal render. Duplicate the dirt pass render layer. adjust the blending mode, one Multiply (30%) and the other one is overlay (15%) (personal preferences po.)
merge the three layers..
Insert the background (actual photo).
Image will look like this.

15.delete the ground part

Image will look like this

16..we can still see the roof and balcony (back part) of the bldg in the actual photo.
Use clone stamp tool (S) and match it with the existing sky.


17. erase and clone some parts in the bldg base and background so that the building and background will somehow blend..

18.adjust levels,contrast,colorbalance etc. as desired (bldg layer)
19.the actual photo is a bit pixilated,noisy and blurred since I only used cellphone camera.
To at least match the rendered bldg. to the actual photo,
Add noise and blur..

Save the file now as jpeg.(eto kac gamit ko).
FINAL OUTPUT
Added chromatic aberration,vignetting,sharpness.

other samples ng photomatch na ginawa ko.

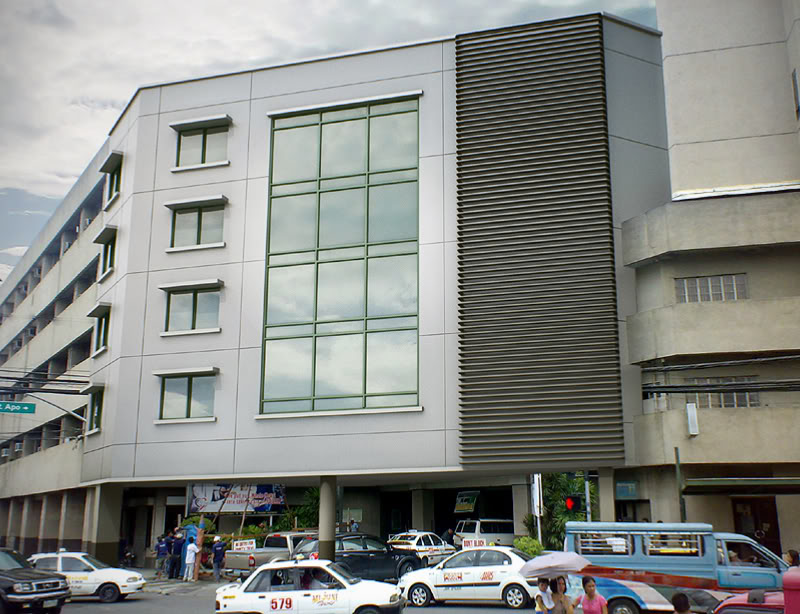


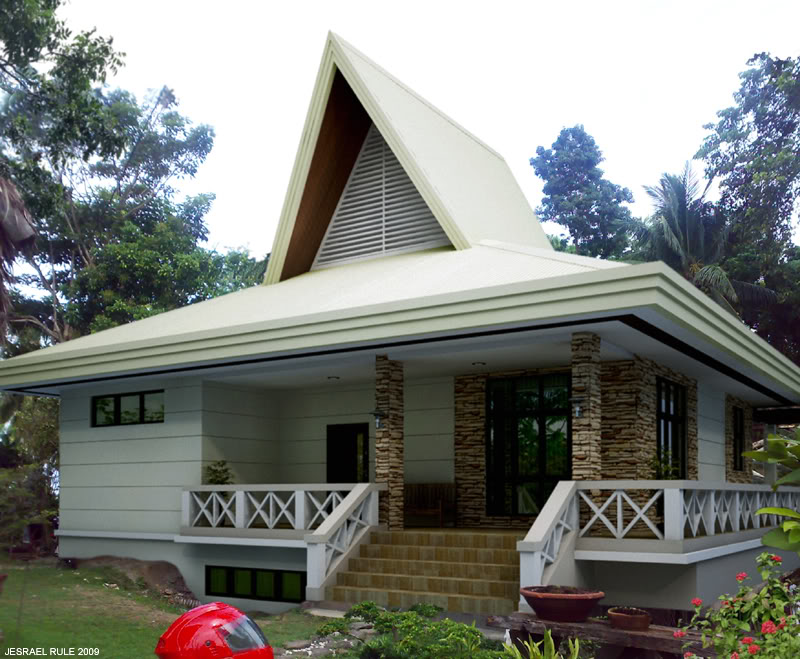
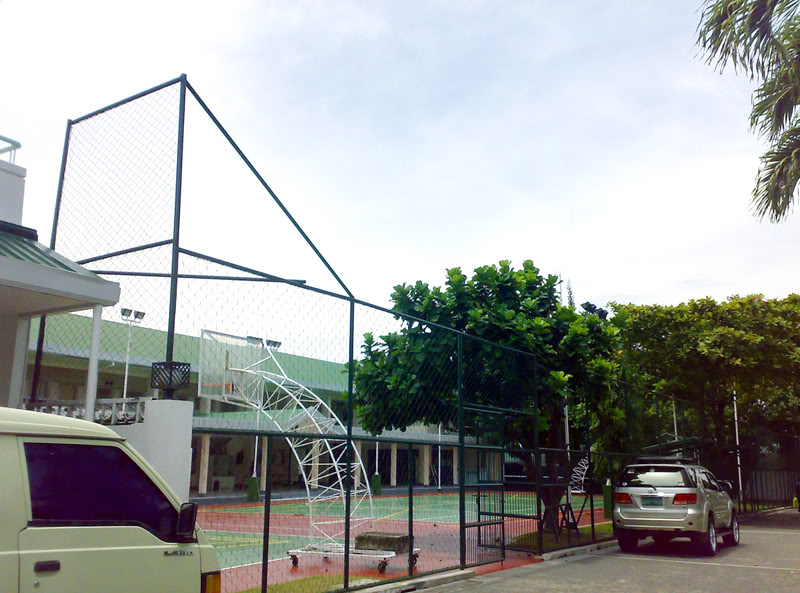
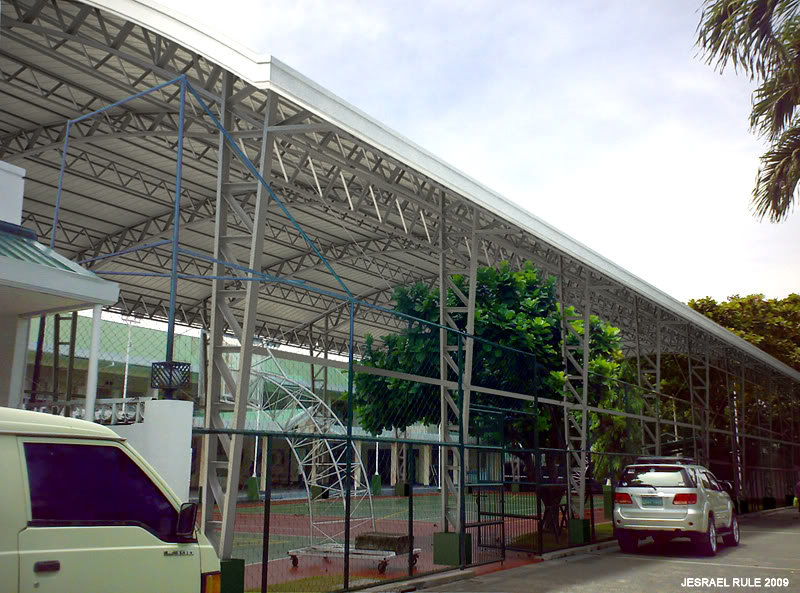
thanks for viewing.....
anyway sana may maitulong eto kahit kaunti.
pag pasesyahan nyo na ang mga palpak dito,,1st time kc na gumawa ng munting tutes..
feel free na e-correct ang mga mali..
kung meron naman kaung additional inputs,,mas ok po..
eto na po.....
BACKGROUND SET-UP
1. make 2 copies of the actual photo in photoshop (for background), one for test render and one for final render.
2. for the test render background at least 400x311(usual test render output ko), and for final render background 1500x1167..
3. go to environment map (press 8) use the test render background ..then press alt+b and check USE ENVIRONMENT BACKGROUND & DISPLAY BACKGROUND so that you can see the background in your viewport..

CAMERA SET-UP
4.create a camera. Find a good angle that will match your model to the actual photo.(mano2x po ung sa akin ha).


5. Create a plane,apply ground map that somehow matches the ground in the actual photo. this will serve as ground reflection in the glass(in my case may glass kase up to floor sa entry sa area kaya naglagay ako) ..create a box ,place it in front and in the side. This will serve as a fence reflection in the glass. I Also created a small box in front, it will serve as the reflection of a small bridge (see actual photo).

6. create a plane,bend it using bend modifier and apply a sky map, (for sky reflections in the glass)
Add trees and other entourage for additional reflections.

LIGHTING
7.place a vray sun (eto kac gamit ko)..it is very important that you know the sun’s position in the actual photo.. (in my case nag base ako sa shadows sa actual photos).
Then place now the vray sun where you think that will match the sun’s position in the actual photo.


TEST RENDER…….
8. for the test render,go to frame buffer (eto kac gamit ko) set the output size same with the size of the bitmap the you used in the environment map. (test render background 400x311)..

Load your test render settings.
Hit render…..
9. play/adjust sun’s intensity until you get the right lighting that you think will match background.
FINAL RENDER…..
10. now change the bitmap (test render background) that you used environment map, replace it with the final render background for a higher resolution(sa akin 1500x1167).
11. load your final render settings.
set the final render output size same with size of the image background environment map.

Hit render….
12. I rendered two images..normal render and a dirt pass render.
13. save the final output as png format so that in photoshop we will just easily insert the background.
POST PRO in PHOTOSHOP….
14. my final render ouput in png format.

14. copy and paste the dirt pass render to the normal render. Duplicate the dirt pass render layer. adjust the blending mode, one Multiply (30%) and the other one is overlay (15%) (personal preferences po.)
merge the three layers..
Insert the background (actual photo).
Image will look like this.

15.delete the ground part

Image will look like this

16..we can still see the roof and balcony (back part) of the bldg in the actual photo.
Use clone stamp tool (S) and match it with the existing sky.


17. erase and clone some parts in the bldg base and background so that the building and background will somehow blend..

18.adjust levels,contrast,colorbalance etc. as desired (bldg layer)
19.the actual photo is a bit pixilated,noisy and blurred since I only used cellphone camera.
To at least match the rendered bldg. to the actual photo,
Add noise and blur..

Save the file now as jpeg.(eto kac gamit ko).
FINAL OUTPUT
Added chromatic aberration,vignetting,sharpness.

other samples ng photomatch na ginawa ko.


thanks for viewing.....
Last edited by jarul on Mon Nov 23, 2009 6:50 am; edited 1 time in total
 Re: simple office bldg._Photomatch_(w/ konting tutorial)
kurdaps! wrote:Ang tiyaga mo a!
Thanks for sharing Sir...
salamat po sir daps.....
Page 1 of 4 • 1, 2, 3, 4 
 Similar topics
» Simple Office Bldg.
» 1 storey res. bldg w/ office
» Modern Office Bldg.
» StrawbErry FiElds forEvEr(update konting tutorial)........................
» Small Office Extension ( Photomatch)
» 1 storey res. bldg w/ office
» Modern Office Bldg.
» StrawbErry FiElds forEvEr(update konting tutorial)........................
» Small Office Extension ( Photomatch)
:: 3d Gallery :: Exteriors
Page 1 of 4
Permissions in this forum:
You cannot reply to topics in this forum


