


Irradiance Particle(how-to)
2 posters
Page 1 of 1

Irradiance Particle(how-to)
![]() by logikpixel Sun Jul 24, 2011 5:51 am
by logikpixel Sun Jul 24, 2011 5:51 am
I get some pretty interesting PM's even though I don't roam these fora anymore.
This was written last year but I hesitated to post it for reasons that it was easily discussed in @edosayla's video tutorials. But for those who want something to read here it is.
Go to the link and download the plugin according to your 3dsmax version.
Installation note is inside the zip file.
http://www.mastering-mentalray.com/index.php?option=com_content&view=article&id=52:ctrlghost-plugins&catid=42:ctimpip&Itemid=65
IMAGE BASED LIGHTING-IRRADIANCE PARTICLE
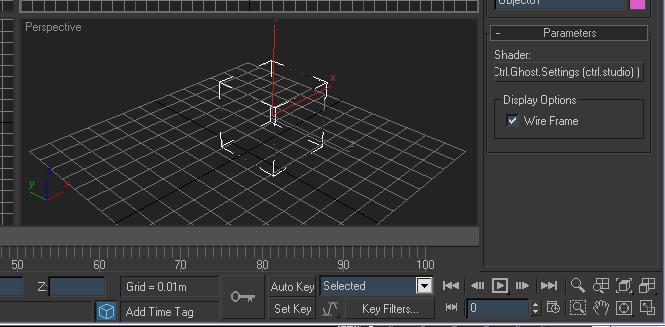
1. Create. Mental ray. mr shader. Click on "None". Choose CTRL.GHOST.SETTINGS

2. Drag in (any) viewport to make a "box".
3. Copy the ctrl.ghost settings as instance to a blank material slot. You now have Irradiance particle and importons.

4. Setup your scene. Create a Skykight from the Standard lights. Turn it off. Click on None to choose your HDRI which will serve as our primary light source and reflection for the scene. Drag and drop as instance to the Environment slot.

Set your exposure as needed. In my case, I needed to set it as low as 0. The explanation as to why it should be set that way can be found here in the comments/ dicussion at http://www.mrmaterials.com/jeffs-blog/91-irradiance-particles-hdrs-and-you.html. Further reading at
http://www.3dallusions.com/ will also quench your "why's and why not's" thirst.
Continuing my simple instructional, drag and drop as instance the environment map to an empty slot in the material editor to change your HDRI into a Spherical Environment map.
5. Turn off Final Gather. In the material editor, enable Irradiance particle. The default settings usually works without much tweaking. I normally set Interpolate to Always. Setting it to Never, however, will give you an accurate render but it will be very slow. Rebuild should be enabled for computations or saving Irradiance particle map. To save the IP map, type a location along with the filename. Render your scene for IP map computation. This may take a while. It is recommended to render for the first time in small output resolution and with a standard material override.

After the first render, which consist of the IP map calculation and the render itself, uncheck the Rebuild so your next renders will "read" the saved IP map.

Paulo Barrelas offers an in-depth explanation at >>THIS BLOG POST<<
For any comments, suggestions, corrections please feel free to post a reply.
Hope this helps somewhat.
Unlocking this shader can be googled, but anyway here: >>LETMEGOOGLETHATFORYOU<<
CHEERS everyone!
This was written last year but I hesitated to post it for reasons that it was easily discussed in @edosayla's video tutorials. But for those who want something to read here it is.
Go to the link and download the plugin according to your 3dsmax version.
Installation note is inside the zip file.
http://www.mastering-mentalray.com/index.php?option=com_content&view=article&id=52:ctrlghost-plugins&catid=42:ctimpip&Itemid=65
IMAGE BASED LIGHTING-IRRADIANCE PARTICLE
1. Create. Mental ray. mr shader. Click on "None". Choose CTRL.GHOST.SETTINGS
2. Drag in (any) viewport to make a "box".
3. Copy the ctrl.ghost settings as instance to a blank material slot. You now have Irradiance particle and importons.
4. Setup your scene. Create a Skykight from the Standard lights. Turn it off. Click on None to choose your HDRI which will serve as our primary light source and reflection for the scene. Drag and drop as instance to the Environment slot.
Set your exposure as needed. In my case, I needed to set it as low as 0. The explanation as to why it should be set that way can be found here in the comments/ dicussion at http://www.mrmaterials.com/jeffs-blog/91-irradiance-particles-hdrs-and-you.html. Further reading at
http://www.3dallusions.com/ will also quench your "why's and why not's" thirst.
Continuing my simple instructional, drag and drop as instance the environment map to an empty slot in the material editor to change your HDRI into a Spherical Environment map.
5. Turn off Final Gather. In the material editor, enable Irradiance particle. The default settings usually works without much tweaking. I normally set Interpolate to Always. Setting it to Never, however, will give you an accurate render but it will be very slow. Rebuild should be enabled for computations or saving Irradiance particle map. To save the IP map, type a location along with the filename. Render your scene for IP map computation. This may take a while. It is recommended to render for the first time in small output resolution and with a standard material override.
After the first render, which consist of the IP map calculation and the render itself, uncheck the Rebuild so your next renders will "read" the saved IP map.
Paulo Barrelas offers an in-depth explanation at >>THIS BLOG POST<<
For any comments, suggestions, corrections please feel free to post a reply.
Hope this helps somewhat.
Unlocking this shader can be googled, but anyway here: >>LETMEGOOGLETHATFORYOU<<
CHEERS everyone!
Last edited by logikpixel on Sun Jul 24, 2011 5:58 am; edited 1 time in total (Reason for editing : image addition)

logikpixel- CGP Apprentice

- Number of posts : 818
Age : 44
Location : sharjah, tarlac, gensan
Registration date : 09/03/2009 -

Re: Irradiance Particle(how-to)
![]() by edosayla Sun Jul 24, 2011 9:33 am
by edosayla Sun Jul 24, 2011 9:33 am
Wow nilabas rin ang tinatago way to go master 

edosayla- The Teacher

- Number of posts : 1367
Age : 46
Location : Cadiz, Talisay, Dubai
Registration date : 06/10/2008 -
Page 1 of 1
Permissions in this forum:
You cannot reply to topics in this forum|
|
|